Maybe you're in your 20s or 30s and still dealing with acne scars that just won't fade. Maybe stretch marks, surgical scars, or those first fine lines are starting to bother you.
If that's you — I see you. And I wish someone had told me what I'm about to share with you.
My Skin Story: What I Tried (and What Didn't Work)
For years, I dealt with hormonal breakouts around my period. I also had a really deep chickenpox scar right in the center of my face. I tried everything — silicone scar sheets, Bio-Oil, and even surgery to "fix" a scar. Spoiler: the surgery just gave me a new one.
I got quoted $375 to $450 per microneedling session at a med spa and felt completely stuck. It was discouraging to pour money and hope into treatments that didn't seem to work long-term.
Why Scars Are So Hard to Heal (But Not Impossible)
Here's the simple science: scars form when your skin replaces healthy tissue with disorganized collagen. That's what makes them feel raised, sunken, discoloured, or uneven.
Unfortunately, no amount of moisturizing will fully fix this. To truly heal, you need to stimulate new collagen production — the kind your skin made before the scar.
My Breakthrough: At-Home Microneedling with Banish
Eventually, I found a much more affordable — and honestly safer — way to do that: the Banisher 3.0 from the Banish Starter Kit.
This tool uses a vertical stamping method instead of a roller, which means no dragging, less irritation, and better precision. It helps signal your skin to rebuild itself with fresh, healthy collagen. I use it once a week at night, always on clean, dry skin.
- Banisher 3.0 Tool — two head sizes: 0.25mm for delicate areas, 1.0mm for body scars
- Banish Oil — Vitamin C + E serum that brightens and calms post-treatment skin
- Vitamin C Cream — locks in hydration and supports the healing process
- Pumpkin Enzyme Mask — smells amazing, gently exfoliates
- Fighter Gel — calms irritation and inflammation
- Plus a $30 gift card with your first order
My Routine: Safe, Simple, Effective
Before and after every session, I sanitize the Banisher with 70% rubbing alcohol. I never use it on active breakouts, and I gently stamp each area about five times. Immediately after, I apply Banish Oil followed by Vitamin C Cream to lock in hydration and support healing.
"One at-home Banisher session breaks down to about $7.50 — a fraction of what you'd pay at a med spa."
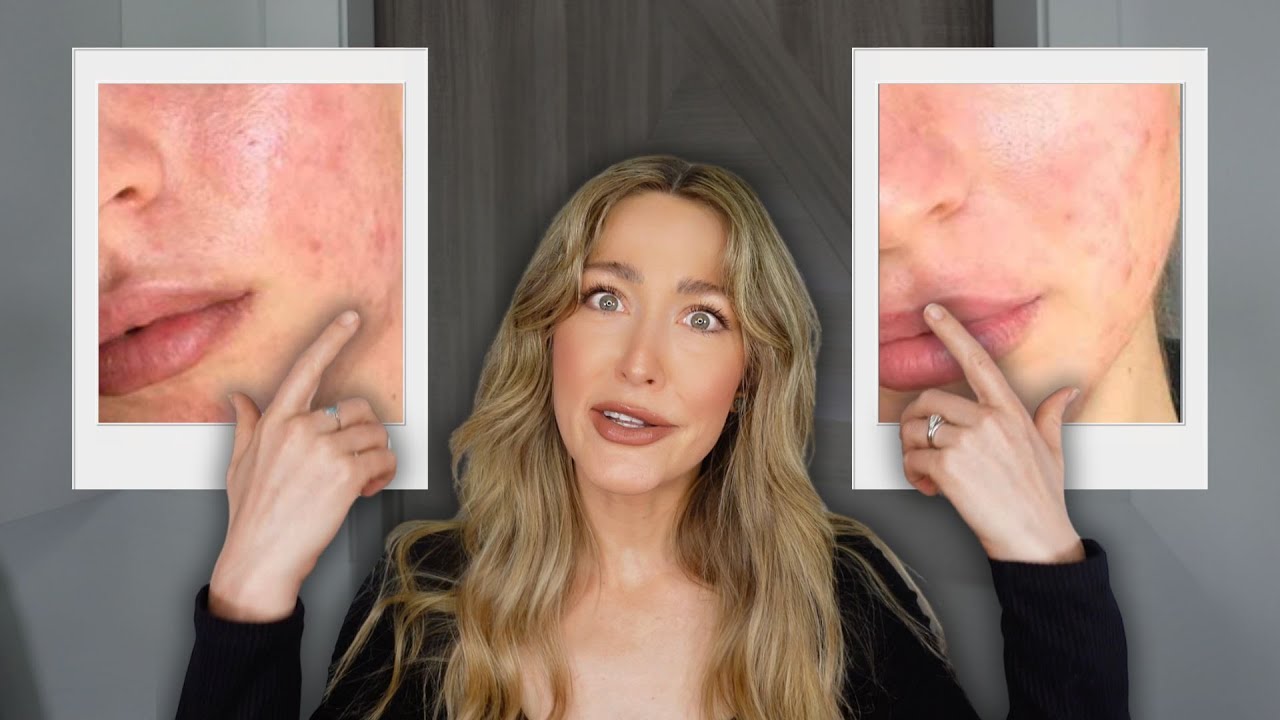
The Results That Made Me Stick With It
After just one month of consistent use, I started seeing real change:
- My skin looked brighter and more even
- Scars began fading and texture smoothed out
- Fine lines around my mouth and eyes looked softer
- Most importantly: I started feeling so much more confident in my bare skin
It wasn't an overnight miracle — but it was the first thing that actually worked for me.
What I Recommend (From Experience)
If you're mainly dealing with dark spots or discoloration, I'd start with a gentle niacinamide toner (I like the one from Anua). But if your skin concerns include texture, deep scars, fine lines, or stretch marks — microneedling is the game-changer.
Pro Tips for Best Results
- Always sanitize your microneedling tool before and after
- Only use on clean, completely dry skin
- Skip makeup and exfoliants for 24 hours after a session
- Wear SPF every single day — collagen needs protection
Final Thoughts
This journey has taught me that skin healing takes time — but it's 100% worth the consistency. I've faded acne scars, softened surgical scars, and even improved stretch marks. Today, I feel more confident in my skin than I have in years, and it all started with one small shift.
Drop a comment if you want me to share a full breakdown of my weekly skincare routine — I'd love to help. And remember: always give yourself grace. Your glow is coming.